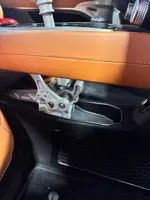
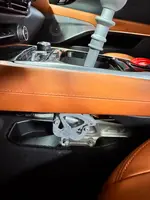
I would suggest doing the mod at the same time you do the floating console. Lifting the whole console would give a bit extra room to maneuver the new tray into place.
I just took out the top of the console around the shift lever and start button (no screws just pry out. Remember to disconnect the start button once you have the trim piece free)
all the bolts have an 8mm head
a box head wrench (ratcheting one if you got it) helps get into the tight areas. I also used an 8mm ratchet with an extension
Total of 11 bolts all together, Remove in this order
3 in the original cubby tray in front of the stick under the rubber mat. once the bolts are out you can remove the short tray.
4 for the base of the shifter mechanism. Shifter will be loose and can be mover around a bit as needed
4 for the spacer for the shifter mechanism. Remove the spacer (slightly higher toward the front. remember when reinstalling
Prep the new long automatic tray
Suggest you cut one square section out of the back of the new tray (the back lip, no need to cut into the bottom at this point) This will help you test fit the tray leaving an opening for the shifter mechanism.
Slid the new tray in place to test fit. May take a bit to get it under the shifter but should slide in place. You will now have a good idea where the spacer sits. The shifters sit directly on top of the spacer so you can mark the bolt holes through the spacer to get a general idea of where you will be cutting the bottom of the long tray
I measured for the rivenuts to determine were to cut out for the spacer. since the tray has a removable rubber liner you do not have to be overly precise cutting out for the shifter spacer. First cut in the bottom if the long tray I erred on the side of smaller cut that I could enlarge. Took 2 or 3 cuts before the tray slid easily over the spacer and sat flush.
Bolted in the tray and the spacer leaving the shifter unbolted
slid rubber mat in and rested the shifter on the spacer
used a pick to poke a hole in the rubber mat though the bold holes. This gave me a good idea where to cut the rubber mat.
Cut out the mat so the shifter rests on the spacer.
Bolt down the shifter and reassemble
I'm Sure I missed something, but this should get you started


