Navigation
Install the app
How to install the app on iOS
Follow along with the video below to see how to install our site as a web app on your home screen.
Note: This feature may not be available in some browsers.
More options
Style variation
📓 Journals My DV Emira and modifications
- Thread starter JonFuller
- Start date
This prefix is only usable in the Lotus Emira Journals forum.
- Thread starter
- #22
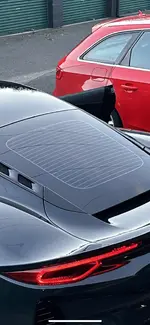
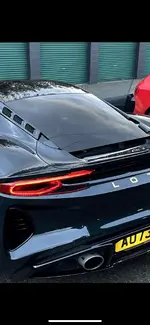
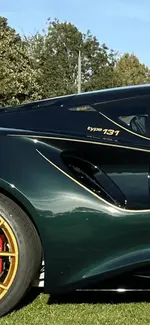
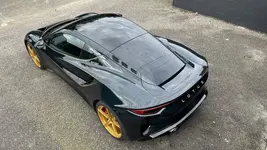
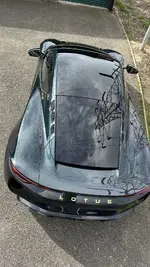
I had my tailgate glass tinted, and the centre of the roof done in black PPF, as I wanted the centreline to be a sweeping black look. Also changing the piano black vents and tailgate trims to body colour, so the A pillar sweeps right through to the duck tail as a continuous colour.
However, the tinting of the tailgate glass was a mess. I ordered it without privacy glass, as I didn't want the side rear 3/4 windows dark, and figured just tinting the tailgate would be ok, but alas, it was a failure. So I bought a new rear glass (obviously privacy spec) and changed it. Happy with the results.
The tailgate glass heater element was really highlighted by the tint film, looked awful.
Se pics, with tint added, and the factory tinted glass.
Attachments
eclat2emira
Emira Maniac
Lovely work Jon! I'd be interested to see how the black centre-line looks in well-lit photos - hard to tell with DV...nice idea and I get where you are coming from.Hi guys, thought I'd share a few pics of my DV Emira which has a few small aesthetic mods, for anyone that's interested.
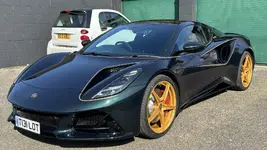
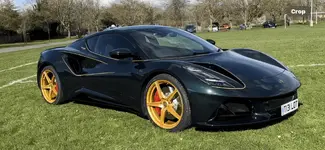
Full PPF from GVE in Uxbridge (discounted 10% thanks to Ade's video), roof centre area is black PPF.
Rear tailgate glass dark tint (so the whole centreline of car is black), however, not happy with the tint results, so going to order a rear tailgate glass in privacy spec (£372+vat), as they look exactly how I want it to. Didn't initially order privacy option, as I don't like the small rear quarter-glass in dark tint, think it looks out of place.
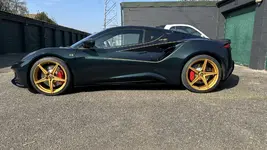
GVE also did the wheel colour change while they had it up on their ramp being PPF'd.
Rear engine vents and trims either side of tailgate soon to be DV rather than piano black, so the green pillar line continues right through from A pillar to duck tail (I bought a set of the vents & trims from B&C which are off being painted DV as I speak)
For context, I shamelessly stole the pinstripe design idea from the Evija JPS themed car, as I figured it would work ok with the very dark look of DV (see Evija pics)
No shame in appropriating the Evija design for the pinstripes - it's beautiful!
The variation in pinstripe width is an important part of this design and you seem to have carried that over successfully. As for the gold wheels, I have always been tempted to do that - even more tempted now! Did you manage to get the paint/powdercoat colour matched to the vinyl of the stripes or did you find a standard shade of gold that was a good match?
- Thread starter
- #25
Hiya.Lovely work Jon! I'd be interested to see how the black centre-line looks in well-lit photos - hard to tell with DV...nice idea and I get where you are coming from.
No shame in appropriating the Evija design for the pinstripes - it's beautiful!
The variation in pinstripe width is an important part of this design and you seem to have carried that over successfully. As for the gold wheels, I have always been tempted to do that - even more tempted now! Did you manage to get the paint/powdercoat colour matched to the vinyl of the stripes or did you find a standard shade of gold that was a good match?
I think in bright sunlight, the black centreline thing will work really well from an elevated view. especially once the vents & trims are in DV (first go at this didn't work, as DV base coat colour match was terrible). I've had another mix done, so hope that's going to work.
I'll do some aerial drone footage when the sun shines.
I chose the gold vinyl for the badges, stripes, lettering etc, and gave a decent sized piece of this vinyl to the chaps at GVE who were doing the PPF and wheel colour change to match them to.
When I hold the sample to the finished, painted wheel, it's very close, but have to say, the thin (6mm) stripes, look a slightly lighter shade than the wheels on the car.
It seems to be a product of being a thin line against a dark background, as the stripes came from the same roll of material as the sample I gave them.
Anyways, It doesn't look enough different to bother me, it's just surprising how the shade appears different, purely through being a thin line as apposed to a larger area.
It was important to me that the tapered ends of the gold stripes were not just straight line tapers, rather, they are curved tapers (like Roman pillars, but only on one side), with a 0.75mm radius at the tips. Also, the length of the tapers are different on doors, rear panel, and at each end of the bonnet stripes, so to ensure it came out exactly as I wanted, I drew them up in CAD, and my local sign guy cut them on his vinyl plotter/cutter.
Last edited:
eclat2emira
Emira Maniac
Thanks for the insights into your process and thinking. I used to work in self-adhesive vinyl in my signwriting days, the radiused end is a smart move as a sharp point will be easily snagged by cleaning cloths.Hiya.
I think in bright sunlight, the black centreline thing will really work really from an aerial shot. especially once the vents & trims are in DV (first go at this didn't work, as DV base coat colour match was terrible). I've had another mix done, so hope that's going to work.
I'll do some aerial drone footage when the sun shines.
I chose the gold vinyl for the badges, stripes, lettering etc, and gave a decent sized piece of this vinyl to the chaps at GVE who were doing the PPF and wheel colour change to match them to.
When I hold the sample to the finished, painted wheel, it's very close, but have to say, the thin (6mm) stripes, look a slightly lighter shade than the wheels on the car.
It seems to be a product of being a thin line against a dark background, as the stripes came from the same roll of material as the sample I gave them.
Anyways, It doesn't look enough different to bother me, it's just surprising how the shade appears different, purely through being a slight line as apposed to a larger area.
It was important to me that the tapered ends of the gold stripes were not just straight line tapers, rather, they are curved tapers, with a 0.75mm radius at the tips. Also, the length of the tapers are different on doors, rear panel, and at each end of the bonnet stripes, so to ensure it came out exactly as I wanted, I drew them up in CAD, and my local sign guy cut them on his vinyl plotter/cutter.
The colour shift thing is real - when working on my paintings the background colour can completely change how you perceive a colour. To me the gold on the wheels looks a little more intense with a slight shift towards a yellow gold rather than white gold hue, but this is so minor it will be imperceptible most of the time.
Looking forward to those drone shots!
- Thread starter
- #27
Indeed it is. This example of it never ceases to amaze me.The colour shift thing is real - when working .........
Jon
Attachments
I have the same glass combination but at zero cost! I specced non-privacy (same issue as you not liking the side view) but they built it with privacy!I had my tailgate glass tinted, and the centre of the roof done in black PPF, as I wanted the centreline to be a sweeping black look. Also changing the piano black vents and tailgate trims to body colour, so the A pillar sweeps right through to the duck tail as a continuous colour.
However, the tinting of the tailgate glass was a mess. I ordered it without privacy glass, as I didn't want the side rear 3/4 windows dark, and figured just tinting the tailgate would be ok, but alas, it was a failure. So I bought a new rear glass (obviously privacy spec) and changed it. Happy with the results.
The tailgate glass heater element was really highlighted by the tint film, looked awful.
Se pics, with tint added, and the factory tinted glass.
Then once delivered they agreed to change the side glass back to non-privacy but keep the rear screen privacy…. Perfect combination IMHO.
scc.131.fe
Emira Fiend
How do I sign up for that!?I have the same glass combination but at zero cost! I specced non-privacy (same issue as you not liking the side view) but they built it with privacy!
Then once delivered they agreed to change the side glass back to non-privacy but keep the rear screen privacy…. Perfect combination IMHO.
driv300mph
Well-known member
I had my tailgate glass tinted, and the centre of the roof done in black PPF, as I wanted the centreline to be a sweeping black look. Also changing the piano black vents and tailgate trims to body colour, so the A pillar sweeps right through to the duck tail as a continuous colour.
However, the tinting of the tailgate glass was a mess. I ordered it without privacy glass, as I didn't want the side rear 3/4 windows dark, and figured just tinting the tailgate would be ok, but alas, it was a failure. So I bought a new rear glass (obviously privacy spec) and changed it. Happy with the results.
The tailgate glass heater element was really highlighted by the tint film, looked awful.
Se pics, with tint added, and the factory tinted glass.
I also ordered mine without privacy glass, but I think it's my only regret... how much did it cost to have the privacy glass swapped in?
- Thread starter
- #32
The glass was £372 GBP (about $470 USD), but I fiited it myself, so obviously avoided the fitment labour cost. Dunno how much an autoglass firm would charge for fitment.I also ordered mine without privacy glass, but I think it's my only regret... how much did it cost to have the privacy glass swapped in?
Last edited:
- Thread starter
- #33
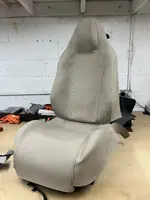
Just getting some trim changes done. Some custom fitted seat covers (protectors), in black alcantara and yellow stitch (as per the oem trim), they're only at the templating stage at the moment,
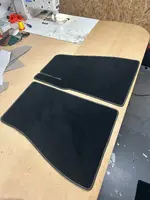
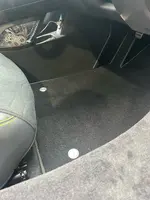
Fitted & bound edged mats, also yellow stitched.
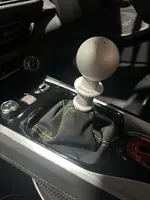
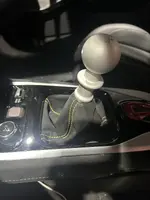
Replacement gear stick gaiter in Alcantara / yellow stitch (standard item is nasty cheap vinyl with black stitch).
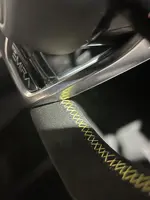
and the oem Alcantara steering wheel, re-stitched in yellow.
Fitted & bound edged mats, also yellow stitched.
Replacement gear stick gaiter in Alcantara / yellow stitch (standard item is nasty cheap vinyl with black stitch).
and the oem Alcantara steering wheel, re-stitched in yellow.
Attachments
Last edited:
- Thread starter
- #36
Hide & Seam in the New Forest.Who did the gear gator and steering wheel work?
BTW, No Crocodiles were harmed during this re trim.
Hide and Seam
Last edited:
- Thread starter
- #37
finished....
Attachments
-
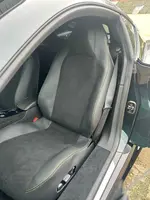 image0.webp179.9 KB · Views: 187
 -
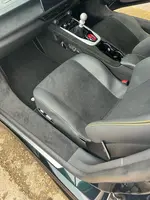 image1.webp252.6 KB · Views: 172
 -
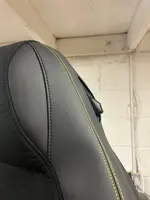 image2.webp95.5 KB · Views: 171
 -
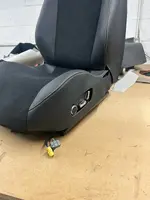 image3.webp173.4 KB · Views: 172
 -
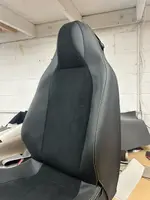 image4.webp109.1 KB · Views: 171
 -
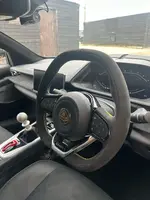 image5.webp123.1 KB · Views: 172
 -
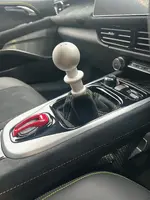 image6.webp163.1 KB · Views: 176
 -
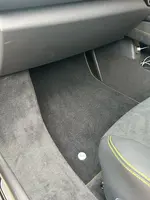 image7.webp264.5 KB · Views: 161
 -
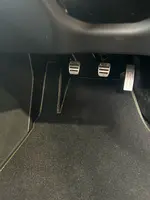 image8.webp173.8 KB · Views: 159
 -
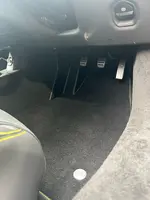 image9.webp182.2 KB · Views: 182
- Thread starter
- #39
Finally got the rear vents and trims painted in a DV that actually matches the bodywork. No drone stuff yet, but here's a shot showing the pillar, in DV from hood through to duck tail....Hiya.
I think in bright sunlight, the black centreline thing will work really well from an elevated view. especially once the vents & trims are in DV (first go at this didn't work, as DV base coat colour match was terrible). I've had another mix done, so hope that's going to work.
I'll do some aerial drone footage when the sun shines.
And a couple of the new Chinese wheels.
Attachments
Last edited:
The front rear and side vents are all DV now, as well as the rear window vents? I couldn't make it out in the video.
The pin stripes around the curves are . They really highlight the shape that gets lost in the dark color.
Hey, how much work went into those wheel center caps? Would you make some on commission?
The pin stripes around the curves are
Hey, how much work went into those wheel center caps? Would you make some on commission?
Similar threads
- Replies
- 7
- Views
- 2K
- Replies
- 0
- Views
- 337
- Replies
- 21
- Views
- 2K
- Replies
- 2
- Views
- 524
