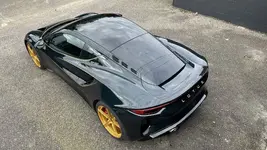
📓 Journals My DV Emira and modifications

This prefix is only usable in the Lotus Emira Journals forum.
  • Thread Starter
  • Thread starter
  • #41
No, the various vents are still piano black. I am waiting for Aerie to offer the full set in CF (diffuser surround, std shaped side skirt, front intake vents, side intake vents, rear outlet vents) then I will purchase and fit them all at once.
I think you have to remove front & rear fenders to fit the side skirts.
Sorry, the wheel centre caps were way more work than I expected, with quite a few failures to get the 4 decent ones that are fitted, really not viable to do as a job.
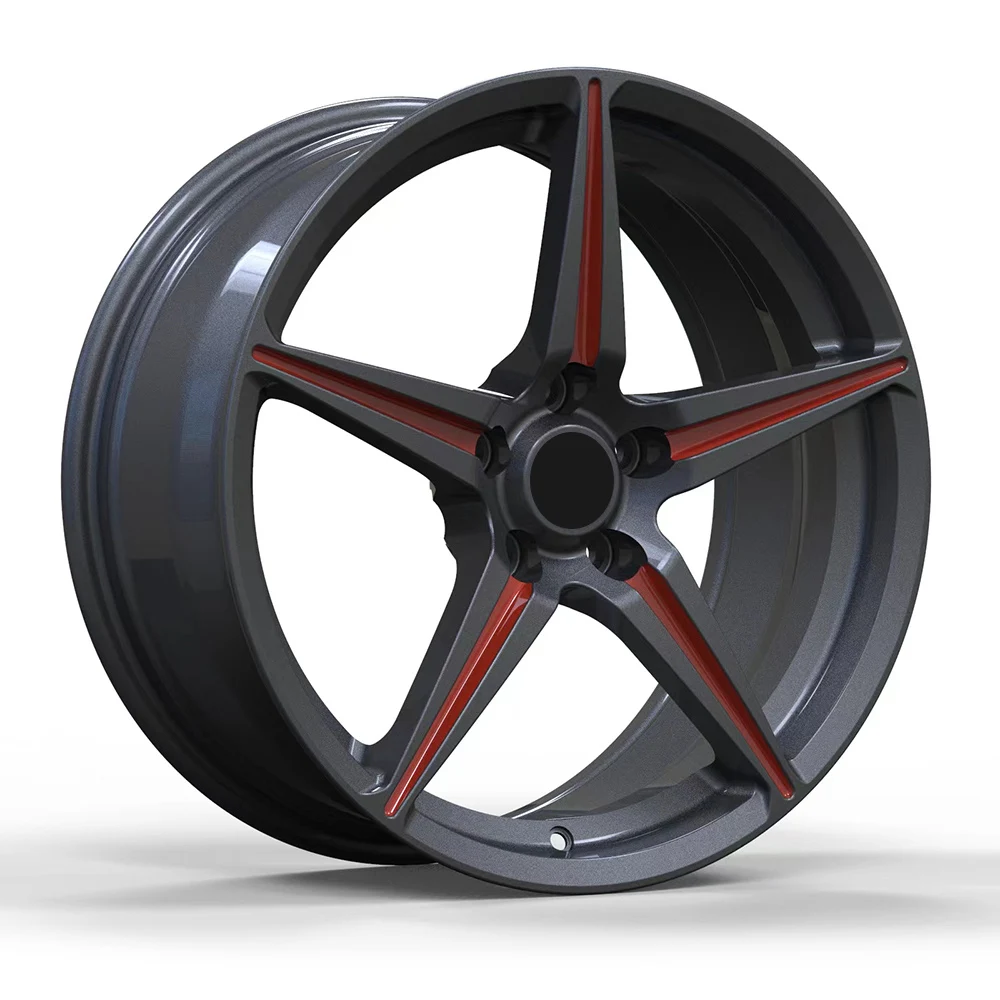
 
Who makes the five spoke wheels that you switched to? I read your thread, sorry if I missed it.

Beautiful mods, I have also been wondering about the back window side vents In body color. Do they get hot? Looking forward to your photos when you get them done in DV.
 
  • Thread Starter
  • Thread starter
  • #43
Who makes the five spoke wheels that you switched to? I read your thread, sorry if I missed it.

Beautiful mods, I have also been wondering about the back window side vents In body color. Do they get hot? Looking forward to your photos when you get them done in DV.
The Wheels were made in China, I modded the design slightly (they're CNC'd, so it's relatively easy to get a design altered should you want to).

There's already a pic of the rear vents in DV, and no, they don't seem to get particularly hot.


Wheel company is here, but you'll need to enter the specific spec for the Emira (dia, width, ET, PCD etc)


There's a load of detail about the wheels, what I altered, and ordering etc in this thread: https://www.emiraforum.com/threads/stock-emira-wheels-and-tires.29/page-6
 

Attachments

  • IMG_4395.jpg
    IMG_4395.jpg
    471.5 KB · Views: 84
Last edited:
  • Thread Starter
  • Thread starter
  • #44
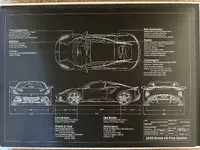
My anodised, brushed Aluminium data wall plate arrived today from Black Art Graphics. (3mm thick)

Really pleased with it, and the personalisation makes it extra special, Dan even drew my custom wheels into it.

I'm a happy bunny.

It's A3
 

Attachments

  • IMG_5537.jpg
    IMG_5537.jpg
    399.1 KB · Views: 80
  • Thread Starter
  • Thread starter
  • #45
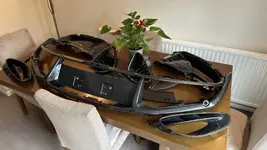
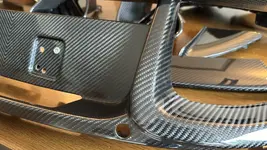
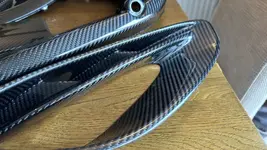
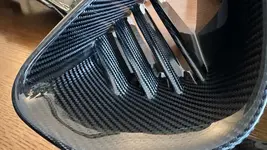
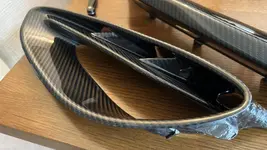
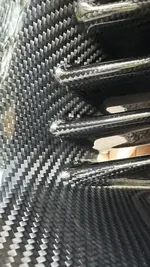
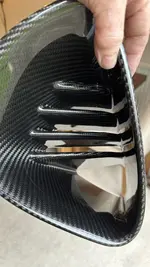
It’s taken 3 months to arrive, but the CF stuff is finally here. Looks pretty good, but holding judgement till I see how well it fits!…

Rear diffuser surround
Front intake vents
Lower splitter strip
Intakes just behind doors
Outlets behind rear wheels.

Looking forward to losing that 'always looking dusty' piano black stuff.
 

Attachments

  • IMG_7085.jpeg
    IMG_7085.jpeg
    259.6 KB · Views: 78
  • IMG_7086.jpeg
    IMG_7086.jpeg
    289 KB · Views: 80
  • IMG_7087.jpeg
    IMG_7087.jpeg
    343.7 KB · Views: 77
  • IMG_7088.jpeg
    IMG_7088.jpeg
    289.9 KB · Views: 72
  • IMG_7089.jpeg
    IMG_7089.jpeg
    237.4 KB · Views: 75
  • IMG_7090.jpeg
    IMG_7090.jpeg
    262.7 KB · Views: 72
  • IMG_7091.jpeg
    IMG_7091.jpeg
    214.4 KB · Views: 76
Last edited:
Jon is that Aerie CF? I'm really happy with mine.
 
  • Thread Starter
  • Thread starter
  • #47
Jon is that Aerie CF? I'm really happy with mine.
Yes, it's been very slow to come (3 months) but it looks pretty good, just hope it fits.

The attachmnt method of the diffuser mesh looks a bit wanky.
 
  • Thread Starter
  • Thread starter
  • #48
Jon is that Aerie CF? I'm really happy with mine.
Did you get the full kit?

I didn't buy the sills, as I wanted standard shape, which they don't yet do.
 
Did you get the full kit?

I didn't buy the sills, as I wanted standard shape, which they don't yet do.
Sills? Oh the side extensions. No, because they wouldn't look good below the yellow.

The mesh is fine. I used RTV on all the perimeter clips and on the wire tabs that hold the mesh in place. You'll also want to use it on the reverse light to hold it in place.
 
  • Thread Starter
  • Thread starter
  • #50
Sills? Oh the side extensions. No, because they wouldn't look good below the yellow.

The mesh is fine. I used RTV on all the perimeter clips and on the wire tabs that hold the mesh in place. You'll also want to use it on the reverse light to hold it in place.
Sills, UK speak for side skirts.


So you got it all to fit snuggly?

Sills also look like a lot of work (removal of front & rear wings (fenders).

I may even be a real Philistine, and just choose a really nice matching carbon PPF film for the side skirts, to avoid all that work.
 
Sills, UK speak for side skirts.


So you got it all to fit snuggly?

Sills also look like a lot of work (removal of front & rear wings (fenders).

I may even be a real Philistine, and just choose a really nice matching carbon PPF film for the side skirts, to avoid all that work.
Ouch that’s a lot to fit side skirts. I would not want remove the rear quarters in case something went wrong. Is there no way you could remove the front wing and push it into the rear locating position?
Surely someone will make some that are easier to fit.
 
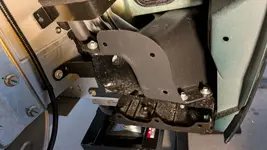
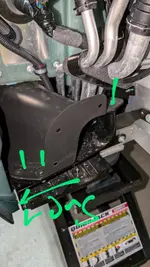
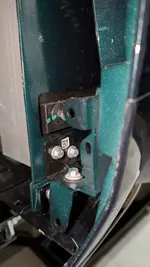
You don't have to remove the front and rear fenders. On the front fender you need to remove the bottom screw and one more at about the height of the wheel arch.

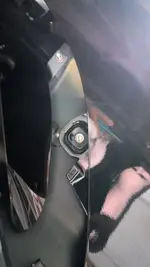
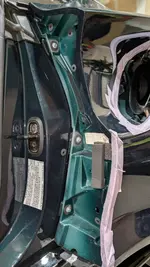
For the rear fender you need to remove the finisher piece that faces the door to access the several screws there, one under the finisher, also the side vents removed, accessed by removing the wheel arch liners (front needed to be removed as well for the previous step), and then remove the one screw behind the vent. Near the bottom of the rear fender near the rear wheel there are three screws.

That gives you enough flex in the fenders to remove the upper sill (skirt).
 

Attachments

  • PXL_20240816_075634692.jpg
    PXL_20240816_075634692.jpg
    227.5 KB · Views: 50
  • PXL_20240808_062955567~2.jpg
    PXL_20240808_062955567~2.jpg
    231.9 KB · Views: 48
  • PXL_20240808_055453199.jpg
    PXL_20240808_055453199.jpg
    242.5 KB · Views: 47
  • PXL_20240816_075455518.jpg
    PXL_20240816_075455518.jpg
    139.8 KB · Views: 48
  • PXL_20240808_062343096.jpg
    PXL_20240808_062343096.jpg
    300.3 KB · Views: 51
  • Thread Starter
  • Thread starter
  • #53
You don't have to remove the front and rear fenders. On the front fender you need to remove the bottom screw and one more at about the height of the wheel arch.

For the rear fender you need to remove the finisher piece that faces the door to access the several screws there, one under the finisher, also the side vents removed, accessed by removing the wheel arch liners (front needed to be removed as well for the previous step), and then remove the one screw behind the vent. Near the bottom of the rear fender near the rear wheel there are three screws.

That gives you enough flex in the fenders to remove the upper sill (skirt).
OK, thanks for the info.

So why did you remove the skirts on yours? I thought you said you didn't change them?

Jon
 
I changed them to make them yellow. I ordered replacement parts and had them painted in advance so that when my car got here the paint would be cured and ready for PPF.

I said I didn't do the Aerie extended side skirts because they wouldn't look good as a dark stripe under the yellow.
 
  • Thread Starter
  • Thread starter
  • #55
Is the piano black strip that has the alloy 'Emira' sill plate, part of the skirt (and detaches with it), or is it separate and stays in place when you remove the skirt?

J
 
The aluminum Emira trim is held down by tape. Under that is the sill finisher which is attached with three screws.
 
  • Thread Starter
  • Thread starter
  • #58
@Time2Fly...

When you fitted the carbon rear diffuser surround (lower bumper), were you able to do this WITHOUT removing the entire rear panel? (do they call it upper bumper?)

Rather hoping it's possible without doing that.

Jon
 
Nope, but removing the rear bumper isn't that hard
 
  • Thread Starter
  • Thread starter
  • #60
Is the system of nasty hidden plastic locators at the join between fender and bumper, the same style as the front ones?
They were a bitch, at least the first one was, as I was unsure how hard to pull and in what direction.
Obviously the second one was easier once i’d got the 1st apart and seen how it worked!
Hate all that plastic clip, latch and screw stuff.
It appears that there used to be more clips in the front that have been ‘removed’. Guessing they realised they’d be impossible to get to for dismantling.
 
Last edited:

Create an account or login to comment

Join now to leave a comment enjoy browsing the site ad-free!

Create account

Create an account on our community. It's easy!

Log in

Already have an account? Log in here.

Aerie Performance Lotus Emira Carbon Fiber Parts GregsRaceParts.com BanC Tech JUBU Performance Advantagelifts.com

Latest posts

Back
Top