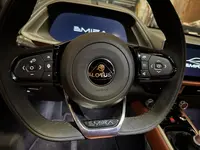
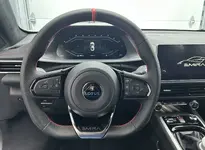
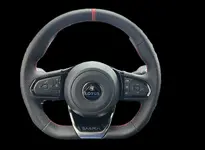
Steering Wheel Press-Type Buttons Now Available from GRP!

  • Thread Starter
  • Thread starter
  • #41
In their website, GRP direct's you to their new Steering Wheels' removal/installation for the instructions, but you only need to follow 3 of the initial steps for the button module removal. It's a fairly easy DIY job. The only step that I found to be missing in that pictured instruction is the one of the removal of the piano black plastic crown after the removal of the airbag module, which essentially involves lifting the 3 plastic tabs on that plastic crown with a thin screwdriver (1top/2 bottom) and pulling it out. Should take only 20 minutes at first try. Hope this helps somewhat.
This^ (y)
And yeah, the piano black trim removal is missing from those steps but easy enough to pop out so the job remains nice and easy to do.
Thanks!
 
In their website, GRP directs you to their new Steering Wheels' removal/installation for the instructions, but you only need to follow 3 of the initial steps for the button module removal. It's a fairly easy DIY job. The only step that I found to be missing in that pictured instruction is the one of the removal of the piano black plastic crown after the removal of the airbag module, which essentially involves lifting the 3 plastic tabs on that plastic crown with a thin screwdriver (1top/2 bottom) and pulling it out. Should take only 20 minutes at first try. Hope this helps somewhat.
Forgot to mention that the oem haptic modules have 2 tiny torx screws you need to remove and are not needed on the new button modules. You may want to refer to the earlier post of Aug 30th on this thread for further detail on that.
 
Last edited:
  • Like
Reactions: GRP
Been trying to get the airbag out for the last hour or so. No success. Maybe my screw driver is too short??? I have no idea, but I sure as heck don’t feel a spring at all…

Maybe I’m one of those un-handy people 🤷🏻‍♂️
 
Been trying to get the airbag out for the last hour or so. No success. Maybe my screw driver is too short??? I have no idea, but I sure as heck don’t feel a spring at all…

Maybe I’m one of those un-handy people 🤷🏻‍♂️
make sure you're keeping the flat end at 90 deg (to the dash/fwd) as you push into the hole. See GRPs instructions for pics of the little release rods. If you dont the screwdriver will slip past that rod and not do anything. Youll feel a bit of resistance if that happens.
pin.png
 
  • Thread Starter
  • Thread starter
  • #45
Been trying to get the airbag out for the last hour or so. No success. Maybe my screw driver is too short??? I have no idea, but I sure as heck don’t feel a spring at all…

Maybe I’m one of those un-handy people 🤷🏻‍♂️

Sorry to hear about the trouble!
Have you looked at the pictures on our instructions?
The screwdriver only needs to be about 4" long at most to make contact with the spring clip.
Here is the link for those if you havent seen them already - GRP Steering wheel Instructions
 
I’ve seen those, and I even went at different angles with the flat completely flat (widest at the bottom - 180 degrees) and even when that didn’t work, I did it the other way just to make sure…. Am I suppose to hear an audible pop? Or feel an audible pop?
 
  • Thread Starter
  • Thread starter
  • #47
I’ve seen those, and I even went at different angles with the flat completely flat (widest at the bottom - 180 degrees) and even when that didn’t work, I did it the other way just to make sure…. Am I suppose to hear an audible pop? Or feel an audible pop?
The opening is tiny but you may be able to peek in there with a flashlight to help align the screwdriver
 
The opening is tiny but you may be able to peek in there with a flashlight to help align the screwdriver
I think it's because the longest screw driver I have is 50mm (about 2") for a flat head. The longer shaft ones are quite a big bigger being 1/4"+ so I'm going to get a 3mm/ 1/8th" screw driver with a 4" shaft from home depot/lowe's to see if that helps! Thanks guys!
 
I think it's because the longest screw driver I have is 50mm (about 2") for a flat head. The longer shaft ones are quite a big bigger being 1/4"+ so I'm going to get a 3mm/ 1/8th" screw driver with a 4" shaft from home depot/lowe's to see if that helps! Thanks guys!
Make sure you push straight down "inward" on that spring. It took me a few tries as well as initially I thought I was supposed to pull left or right on the spring. Ultimately, it released fairly easily when I pressed inward.
 
Make sure you push straight down "inward" on that spring. It took me a few tries as well as initially I thought I was supposed to pull left or right on the spring. Ultimately, it released fairly easily when I pressed inward.

Good thing I’m renting my office from a friend who owns a body shop. Got it replaced!!! Told me it was just like the dodge’s airbag retention spring. So he got it out in like 10 seconds, put painters tape over the hole like a pro, and then the NEXT biggest challenge: removing the steering wheel trim. There are 3 retention clips on top, and 2 clips on the bottom, and then there’s the “mushroom head” pins that require some force to get out! We couldn’t get the top (hidden clips) and we thought it was screwed down. BUT, he went in from the back and got them off! The center you can see, but the top left, top right you can’t.

Then there’s buttons themselves weren’t a walk in the park either: they’re pressed in with the “mushroom head pins” which he had a prying tool to get leverage and pried them off (after the removal of the 2 torx).

After everything, I’d give this a 8-9/10 in difficulty for installation if you’re not the best around a vehicle. I’ve changed my oil on my old Mazda before, changed tires, repaired a flat tire, and replaced my Elise’s stock radio via clutchfield’s wire harness. I’ve also removed the Elise’s steering wheel as well to refinish the trim that was showing age.

Those are WAAAAYY easier compared to this! Like I said, I’m a noob. I may have eventually figured it out, but it would’ve taken me 4-5 hours+ with my knowledge. Also, I’m trying to be super super careful because it’s the most expensive car I have ever bought!

But now I know what to feel for should I replace the steering wheel! Also, he said it’s MUCH easier than dodge’s airbag!
 

Attachments

  • IMG_5570.jpeg
    IMG_5570.jpeg
    237 KB · Views: 26
  • Thread Starter
  • Thread starter
  • #51
Can someone please explain to me like I’m 5 how to get the OEM buttons off. I have removed the two torx screws, and have tried prying it out by using a big screwdriver leveraged on the torx screw underneath, but it doesn’t seem to budge, and I’m afraid to break something.

A photo of the underside of the oem button assembly would be immensely helpful to know how it’s attached to the wheel, but just a thorough explanation of the process would help too.

Does it come outward from the wheel or slide to the side. Do I need to remove the third screw on the assembly too?

Getting desperate 😬🙂
Did you get it figured out? They pull straight outward. It takes a bit of force because they have pins that are pressed into some dense foam.
 
Did you get it figured out? They pull straight outward. It takes a bit of force because they have pins that are pressed into some dense foam.
Yes, I managed to get them loose. It took a bit more prying force than I was comfortable with at first. But once I got them lifted a bit, I could pull up on the trim around them while prying from the bottom and they finally came out
 
  • Like
Reactions: GRP
Yes, I managed to get them loose. It took a bit more prying force than I was comfortable with at first. But once I got them lifted a bit, I could pull up on the trim around them while prying from the bottom and they finally came out
Yeah, 3 on top, 2 on bottom! I accessed the “hidden” 2 from the back
 

Create an account or login to comment

Join now to leave a comment enjoy browsing the site ad-free!

Create account

Create an account on our community. It's easy!

Log in

Already have an account? Log in here.

Back
Top