The lower triangular piece needs to be removed first. There is a tab on that piece that needs to be pressed to remove it.Great instructions from Crestima and others!
I’m just struggling with one thing -
Wanted to use the method running the power to that spare bolt under the Rear Left fuse box rather than drill into the rear hatch to the battery as it seems less messy.
But I cannot remove the fuse box panel!
Tried for ages and it just won’t budge, worried I’ll snap it.
There’s a catch on the left and on the right and I think I can feel one underneath but no matter how much I wiggle it, it won’t come free.
Can anyone help?
I’m trying to remove it with only the rear quarter panel off, does it only come off with the whole rear panel removed also?
Navigation
Install the app
How to install the app on iOS
Follow along with the video below to see how to install our site as a web app on your home screen.
Note: This feature may not be available in some browsers.
More options
Style variation
You are using an out of date browser. It may not display this or other websites correctly.
You should upgrade or use an alternative browser.
You should upgrade or use an alternative browser.
Adding a subwoofer
- Thread starter John_Matrix
- Start date
That’s perfect. Done now.
Only thing is I can get the main fuse panel back on but cannot get the lower triangular bit on, can’t get it to fit round that lower metal horizontal brace…..don’t suppose any tips for refitting this bit? I don’t suppose it’s that critical to have that lower panel back on but would be nice!
Kicker Hideaway installed and as others have said, the difference is incredible.
One £400 upgrade has made the audio much much better, prob all I need to make me happy with it. Thanks again for all the tips.
I find I need the Gain on almost the lowest setting (25% max) otherwise it makes the car shake and will blow my ear drums!
Where do you set the crossover setting? I’ve got mine turned near the lowest also.
John_Matrix
Emira Fan
- Thread starter
- #103
Is there no self amped sub that can sit where the existing sub is? Doesn’t look good having a speaker in a box on the shelf.
My settings are similar to yours on what my ears thought was the best balance. Gain around 25%, crossover set between 50-60hz.That’s perfect. Done now.
Only thing is I can get the main fuse panel back on but cannot get the lower triangular bit on, can’t get it to fit round that lower metal horizontal brace…..don’t suppose any tips for refitting this bit? I don’t suppose it’s that critical to have that lower panel back on but would be nice!
Kicker Hideaway installed and as others have said, the difference is incredible.
One £400 upgrade has made the audio much much better, prob all I need to make me happy with it. Thanks again for all the tips.
I find I need the Gain on almost the lowest setting (25% max) otherwise it makes the car shake and will blow my ear drums!
Where do you set the crossover setting? I’ve got mine turned near the lowest also.
I did not put in sound deadening, so I experience similar panel resonance.
you could try to loosen the 3 bolts holding the fuse box in place and raise it a bit. That may provide more clearance. If that does not work, post a picture of your situation. I think you want that lower piece on as it protects anything from coming in contact with that live main power wire.Can anyone help with my problem refitting the lower triangular portion of the fusebox panel? Sounds stupid but I just can’t get that bit back on!
This has been a great thread. I finally completed adding the sound deadener and insulation to my car. It's been apart for weeks. My issue was I wanted the bass to sound consistent and it had not prior. I preferred not to add an external sub although this post has proved that the Kicker (and other options) really work well to improve the sound and can look rather stealthy. I just buttoned my interior up and have to say the change is significant. It's much quieter inside and I can hear/feel the bass a lot more. I've tried many different types of music and so far, do not hear the annoying sound that I did before intermittently. I've had the car running but have not taken it out on the road yet. I'd be happy if it sounds the same on the road and would not add an external sub at this time. It's clear the sound deadener/insulation is a worthwhile if tedious mod.
Just thought I would share.
Just thought I would share.
Super cool and I'm Focal for life...love their sound profile and I currently have a Flax setup in one of my cars...those tweeters are sublime. Depending whether I go with a 2-way or 3-way, here are the amp&DSP's I'm looking at:I like your approach!
I'm also waiting for my Emira, and use to much time on thinking of audio upgrade.
What kind of DSP will you run?
My plan at the moment is to use Focal speekers as I have used this in previous cars and are happy with the sound.
I plan to use the K2 Power M series in the Emira;
FRAK tweeters on dash
6.5 KM in the doors
2 x 5" Sub KM
I will probably not use any rear speakers, as I think to much speakers tends to fuck up the sound.
I will use Helix M4 DSP to power the front ( one channel to each speaker) and Helix M1 X for the sub's. I've also used DSP from same producer in my MB E class dd, so I'm familiar with the software and pleased with the sound.
Have you idea if there is any signal cable into factory Amp that can be used for the DSP or do you plan on using the high level signals?

Car Audio | DSP Amplifiers | Blackbird Amplifier
Power, flexibility, and precision in one compact package. The Blackbird features 8 bridgeable speaker outputs and 4 DSP-controlled RCA outs, delivering 12 DSP controlled channels witn almost unlimited tuinng control. Ideal for OEM integration, active systems, or hybrid sub setups. Clean...
 www.arcaudio.com
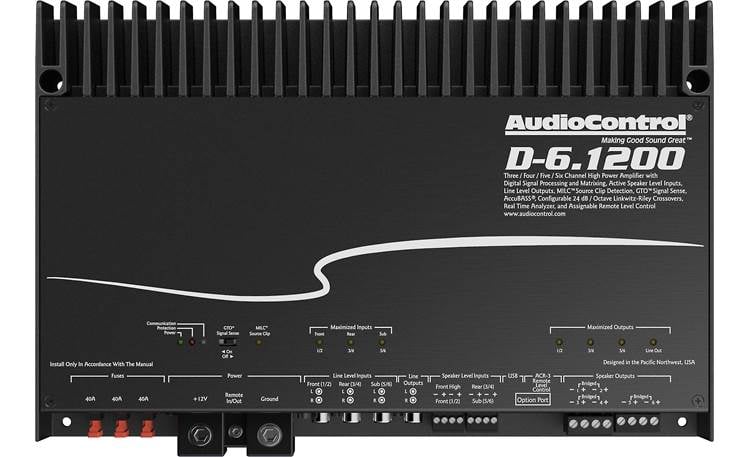
AudioControl D-6.1200
D Series 6-channel car amplifier with digital signal processing — 125 watts RMS x 6
I spec'd the base audio system so have no clue what the wiring and speaker setup will be. Likely a high level input, but I'll see once I dig in. I would love to be able to re-use the free air enclosure for the 5"...sealed up of course. Would be super cool if I could hack that up and force an 8" sub but again, I have no idea what it will look like until I get it.
I think the flax is more than good enough, but K2 is practically Lotus yellow...so we know what has to be done right???
This has been a great thread. I finally completed adding the sound deadener and insulation to my car. It's been apart for weeks. My issue was I wanted the bass to sound consistent and it had not prior. I preferred not to add an external sub although this post has proved that the Kicker (and other options) really work well to improve the sound and can look rather stealthy. I just buttoned my interior up and have to say the change is significant. It's much quieter inside and I can hear/feel the bass a lot more. I've tried many different types of music and so far, do not hear the annoying sound that I did before intermittently. I've had the car running but have not taken it out on the road yet. I'd be happy if it sounds the same on the road and would not add an external sub at this time. It's clear the sound deadener/insulation is a worthwhile if tedious mod.
Just thought I would share.
Seems that the feedback has been pretty unanimous that sound deadening improves the perceived sound and mitigating resonance. I'll be doing this soon as well. My approach has been doing things in phases so I can assess the progression of improvements.
If you don't mind me asking, which sound deadening materials did you use and where did you apply them? Similar to the others who have done this mod, I'm assuming?
Thanks Raptureyou could try to loosen the 3 bolts holding the fuse box in place and raise it a bit. That may provide more clearance. If that does not work, post a picture of your situation. I think you want that lower piece on as it protects anything from coming in contact with that live main power wire.
Had a second go at it, just cannot get it into place - like you say, better to get it in as it will protect that live wire.
Here’s a pic, maybe I have to remove more interior/trim to get at it - sorry, I’m reasonably handy generally although not very experienced with tearing up car interiors and a bit nervous when it’s my pride and joy!
It's tough to articulate into words, but I just had to fiddle with it, by way of understanding the attachment points/fixings and getting those to clip back into place. If you haven't already, take a look at where those points are and see if you can work those with more effort to get them to clip in place.
I agree that it did take slightly more effort than just popping the cover back on, like the top one.
I agree that it did take slightly more effort than just popping the cover back on, like the top one.
First, you can remove that white paper on each piece. I's just a protective wrap that someone did not remove. Also, did you attach the power to the lug in that fuse box versus running it to the battery? if so, it's possible that connection is impeding the lower plastic piece when you try to install it?Thanks Rapture
Had a second go at it, just cannot get it into place - like you say, better to get it in as it will protect that live wire.
Here’s a pic, maybe I have to remove more interior/trim to get at it - sorry, I’m reasonably handy generally although not very experienced with tearing up car interiors and a bit nervous when it’s my pride and joy!View attachment 61512View attachment 61513
It is kind of tricky to get it to slide into that space in general, but it should go on if nothing is in the way.
Hi jpl29,Seems that the feedback has been pretty unanimous that sound deadening improves the perceived sound and mitigating resonance. I'll be doing this soon as well. My approach has been doing things in phases so I can assess the progression of improvements.
If you don't mind me asking, which sound deadening materials did you use and where did you apply them? Similar to the others who have done this mod, I'm assuming?
I decided to use products from Second Skin Audio. I used the following:
Damplifier 1 MM on the doors and inside rear quarter area – 20 Sq Ft total https://www.secondskinaudio.com/sound-deadening/damplifier
Damplifier Pro 2 MM on the rear bulkhead – 4 sheets total https://www.secondskinaudio.com/sou...eQNBV-kT1fpQv8sfhUwGSYCuqwdso4woaAlmKEALw_wcB
Mega Zorbe Hydrophobic Foam – Peel and Stick – 3 Sheets total https://www.secondskinaudio.com/sound-absorbing/mega-zorbe-foam
Thanks to @crestima and @KJWEmira for their advice along the way, they were the trailblazers and provided me a lot of information, some of which is in the details below.
I began with the interior of the doors and the door cards. These come apart more easily than expected and go back together pretty well also. You do need to unclip all the wiring to remove the door cards and remove the 3 bolts holding the window motor on and remove the door opener bit to completely remove the card. Those window motor screws were the trickiest part for me when it came to the reinstall. I installed the regular Damplifier inside the doors cutting each piece in about a 10-inch sections to maneuver them into the door cavity. I worked my way from the front of the door to the back. There is some wiggle room when installing the Damplifier, you can move it around a bit before it is pressed in place for good. I would guess I covered 85-90% of the inner area of the exterior door panel. Because of my OCD, I went back and filled in some areas on the doors that you don't see on the pictures
The door cards are much more tedious if you take the path of cutting out each little section as I did. I used a 6-inch-wide blue painters tape to make a template for the pieces using a sharpie. The 6-inch tape lets you make more pieces at one time. There may be a better way to make a template, but this worked for me. You can cut the Damplifier product with ordinary scissors which is helpful. You can cut holes with any type of utility knife. The holes are a bit of a pain. I fully covered the entire door card grid sections which allows the panel to be as serviceable as it was before. This took a while, but I could do it in my spare time in my kitchen. I used about 3 pieces of the 1MM Damplifier on the door cards and the rest was used for the interior of the door and rear quarters.
I then put the 1MM Damplifier in the rear quarter areas and put some on the sub box and the metal brackets for the speaker and amp mounts. I covered this area also about 85-90%. I also made the pressure relief piece which is next to the sub fit better, I’m sure that was adding some noise before, and may still be. Interestingly, there was no hole cutout behind my subwoofer like I have seen on other pictures that show the sub removed. Maybe a running change? A word of caution when removing the brackets for the amps and speakers in the side where the sub is installed. One of the amps has 4 small plastic spacers behind it that will fall down and get lost in the lower area of the rear quarters (ask me how I know). Two of the bolts for the amp need only to be loosened to remove the bracket as they have slots rather than holes for the mount. The other two bolts need to be removed so grab the spacers when you remove the bolts. The other side where the fuse box is does not have spacers but do be careful not to drop the bolts. Working in the back area can be difficult as it is very tight and you do need to be a contortionist to access some areas.
At this point I thought I was done, I had not planned to put the sound deadener on the rear firewall. After thinking about it though, and realizing the engine was literally right there I had a change of heart. I decided to order the thicker Damplifier Pro for that area and at the same time decided to add the Mega Zorbe (some name) insulation to the rear quarter area. I figured I only wanted to take the car apart once for this. I had the doors back together and was not going to take them apart to add the Mega Zorbe insulation. I completely covered the rear firewall after temporarily removing the stuck in place factory sound deader piece. then I applied the peel and stick Mega Zorbe insulation in the rear quarter areas and around some areas of the firewall that were not covered by the factory insulation. This product was easy to work with. I cut smaller 5- or 6-inch sections and pieced it all together. It is easy to fill in gaps with this. I found it was also not quite a sticky as some reviews show and had no real problems with this install.
Collectively all the products quiet down the interior a lot. I’m excited to get it on the road soon to feel the real-world impact. Whether adding a sub or not I would highly recommend this type of product. I added about a total of 15 pounds of material which will be offset by the anti-gravity battery once I purchase and install that.
The doors now also sound like a Porsche when they are closed which is a big uptick.
Good luck on your install.
Edit: A few things I forgot to mention. There was a bracket missing from the body that is used to attach the rear quarter trim on one side. Didn't appear to make much difference in terms of the panel attachment. There were also a few bolts/screws that were loose. One had a washer on it and would certainly make some noise. I never specifically heard it prior, but it was loose. A few other oddities where some plastic parts did not have the protective wrap removed. Hand built, I guess. Still, all in all it seemed screwed together pretty well.
Last edited:
Hi jp129It's tough to articulate into words, but I just had to fiddle with it, by way of understanding the attachment points/fixings and getting those to clip back into place. If you haven't already, take a look at where those points are and see if you can work those with more effort to get them to clip in place.
I agree that it did take slightly more effort than just popping the cover back on, like the top one.
It is possible that the new power wire is impeding getting that lower panel on but tbh I think it’s impeded by that cross strut before I can even get it close to getting it in to place. Did you have to modify that lower panel (by cutting out a slot) after running the new power wire?
I could give it a third go but don’t think I can be bothered, don’t see why I’d have any more luck 3rd time round.
Maybe will just ask Lotus to see if they can reinstall it when next in for a service….
I did not have to make any cuts or modifications to the lower cover. I used the unused battery lug on the left, although the power wire to the subwoofer is 16GA i believe, so it does not occupy much space.Hi jp129
It is possible that the new power wire is impeding getting that lower panel on but tbh I think it’s impeded by that cross strut before I can even get it close to getting it in to place. Did you have to modify that lower panel (by cutting out a slot) after running the new power wire?
I could give it a third go but don’t think I can be bothered, don’t see why I’d have any more luck 3rd time round.
Maybe will just ask Lotus to see if they can reinstall it when next in for a service….
I fitted the pioneer tweeters and kicker sub today and not overly impressed. I think I got ore of an improvement by applying sound insulation and deadening.
In terms of the sub, I tapped into the standard sub wiring so not getting a good frequency range even with the crossover at max. e.g bass guitar - higher frequencies are hardly there at all even when slightly lower frequencies are strong. It seems the standard amp divides frequencies quite sharply between speakers.
Maybe I’ll try to add the signal from the other rear speaker (I think there’s another one back there?) and see how that goes.
Orchardbike
Emira Fanatic
Bang for buck, when I’ve upgraded the audio in previous cars, the biggest improvement comes from sound deadening.I fitted the pioneer tweeters and kicker sub today and not overly impressed. I think I got ore of an improvement by applying sound insulation and deadening.
In terms of the sub, I tapped into the standard sub wiring so not getting a good frequency range even with the crossover at max. e.g bass guitar - higher frequencies are hardly there at all even when slightly lower frequencies are strong. It seems the standard amp divides frequencies quite sharply between speakers.
Maybe I’ll try to add the signal from the other rear speaker (I think there’s another one back there?) and see how that goes.
Ok, I want to look into combining the frequencies of all the OEM rear speakers and send them to my aftermarket sub and use the sub's built in freq limiter. The signals I'm getting from the sub speaker are cut off really sharply and results in some bass notes being strong and others slightly higher being totally cut off.
Would anyone with some wiring knowledge know how this would be achieved? I was thinking connection the upper rear speaker signal to the sub too but worried that the OEM speakers would then get both signals too. I'm not sure if this is the case. I'm also not sure if the rear left and right speakers are receiving left and right signals or just mono. Any advice would be appreciated.
Would anyone with some wiring knowledge know how this would be achieved? I was thinking connection the upper rear speaker signal to the sub too but worried that the OEM speakers would then get both signals too. I'm not sure if this is the case. I'm also not sure if the rear left and right speakers are receiving left and right signals or just mono. Any advice would be appreciated.
Emira Forum Images


Emira Forum Images
Similar threads
- Replies
- 5
- Views
- 844
- Replies
- 3
- Views
- 1K
- Replies
- 12
- Views
- 2K

