Honestly, painting it red would be far more likely to produce good results. Painting it would allow for covering layer lines and smoothing it out in general. Plus then the can match the red and put a high gloss or satin clear on itThis is a fantastic thread and set of instructions @kitkat, thank you!
I now need to buy a 3D printer and print the finishing piece in red to match my red leather. If that doesn't look quite right, then covering it with black alcantara might work well, too.
Navigation
Install the app
How to install the app on iOS
Follow along with the video below to see how to install our site as a web app on your home screen.
Note: This feature may not be available in some browsers.
More options
Style variation
You are using an out of date browser. It may not display this or other websites correctly.
You should upgrade or use an alternative browser.
You should upgrade or use an alternative browser.
DIY: Floating Console Modification
- Thread starter kitkat
- Start date
- Thread starter
- #43
Just use a 3D printing service closer to you or even search Facebook marketplace for someone to print you parts from their home. I see those all the time, and then sand/paint.This is a fantastic thread and set of instructions @kitkat, thank you!
I now need to buy a 3D printer and print the finishing piece in red to match my red leather. If that doesn't look quite right, then covering it with black alcantara might work well, too.
gpslgs
Member
- Jan 21, 2022
- 6
- 5
- Status:
- Emira on order
You have a very cool idea. Looks awesome!This is next level weight saving
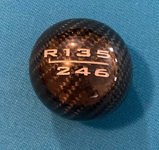
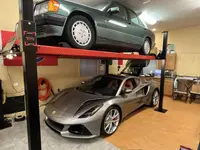
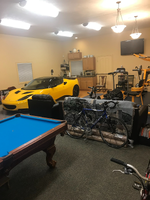
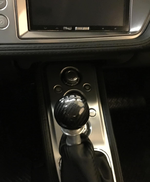
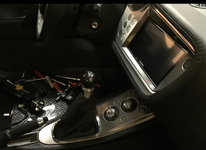
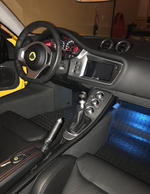
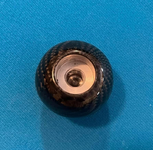
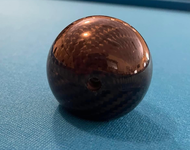
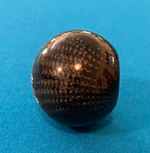
This would look incredible on your setup. I had an Evora for 5 years and had this custom made 6 months before I sold it with just over 2000 miles on it. Just received my 2024 nimbus grey Emira with auto after 2 years and 10 months so I have no use for it any longer. Willing to sell it if interested. Here’s a description.
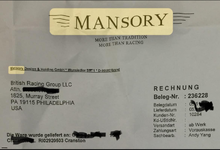
LOTUS Custom carbon fiber SHIFT KNOB from MANSORY in Germany. Ordered a new shift knob from Lotus -$110. Then shipped to Mansory in Germany to be carbon fibered. Took 90 days to receive back from them. Carbon knob has maybe 100 miles of use. Basically brand new perfect condition. The workmanship
is phenomenal. My cost with all shipping was just over $500. and that was 5 yrs ago.
I am willing to sell it for $350.
if interested.
Leave a comment or email me at caffeitri@aol.com and I
will get back to you.
THIS IS NOT EBAY JUNK!
If not familiar with Mansory here is their site; Mansory.com
Attachments
-
 IMG_9610.webp875.9 KB · Views: 127
 -
 IMG_9568.webp137.7 KB · Views: 130
 -
 IMG_9606.webp1.6 MB · Views: 128
 -
 IMG_9617.webp296.3 KB · Views: 126
 -
 IMG_9616.webp491.9 KB · Views: 124
 -
 IMG_9615.webp423.7 KB · Views: 138
 -
 IMG_9614.webp839.6 KB · Views: 130
 -
 IMG_9612.webp1.3 MB · Views: 123
 -
 IMG_9613.webp538.1 KB · Views: 114
 -
 IMG_9611.webp885.3 KB · Views: 119
Sorry. First time posting.

Lotus Emira Forum Marketplace
Buy/Sell/Trade - Market place for and by the EmiraForum.com community.
gpslgs
Member
- Jan 21, 2022
- 6
- 5
- Status:
- Emira on order
Thank you, much appreciated. Was not being disrespectful. Just did not know. Will change this this evening. Again, thanks for the help.
Lotus Emira Forum Marketplace
Buy/Sell/Trade - Market place for and by the EmiraForum.com community.www.emiraforum.com
gpslgs
Member
- Jan 21, 2022
- 6
- 5
- Status:
- Emira on order
Tried to list on marketplace but it would not allow me to. Would you have any idea why? Not having much luck.Thank you, much appreciated. Was not being disrespectful. Just did not know. Will change this this evening. Again, thanks for the help.
You need a minimum number of posts before creating a listing.Tried to list on marketplace but it would not allow me to. Would you have any idea why? Not having much luck.
This is really a cool mod, thanks again KitKat!
I am partially through the installation; I have pried out center console panel. This may be obvious, but you could just install the shift boot delete at this point and not remove the mesh cages if you wanted. I'm going to do the complete install, but this could be an option for those that do not want to remove all of the other components to remove the mesh.
I am partially through the installation; I have pried out center console panel. This may be obvious, but you could just install the shift boot delete at this point and not remove the mesh cages if you wanted. I'm going to do the complete install, but this could be an option for those that do not want to remove all of the other components to remove the mesh.
That is a good point, you can leave the mesh on if you don't want the full exposed linkage. One thing to be aware of is be more careful about dropping things in there if you leave the mesh on. It will be more difficult to fish it out.This is really a cool mod, thanks again KitKat!
I am partially through the installation; I have pried out center console panel. This may be obvious, but you could just install the shift boot delete at this point and not remove the mesh cages if you wanted. I'm going to do the complete install, but this could be an option for those that do not want to remove all of the other components to remove the mesh.
Last edited:
- Thread starter
- #53
This is really a cool mod, thanks again KitKat!
I am partially through the installation; I have pried out center console panel. This may be obvious, but you could just install the shift boot delete at this point and not remove the mesh cages if you wanted. I'm going to do the complete install, but this could be an option for those that do not want to remove all of the other components to remove the mesh.
Yup, if that's what you want it can be done that way. That was the natural progression for me.
I'm almost done with the complete install now, just have to reinstall the lower kick panel.
The instructions were really great. The only thing different for me is that I could find no screws that attached the console to the dash area as in section 3, step 7 of the instructions. They just don't seem to be there for me, I searched for quite a while. I removed all of the other screws and could still lift the console enough to remove the mesh. Maybe there was a running change, or maybe I'm just blind.
Cool mod!
I’ve also done it slightly differently (until I can get the 3D printing sorted).
Left the gaiter on:

It’s an Alcantara one from Hide and Seam so still looks OK.
Polished up the moustache a bit, but deliberately not to a mirror.
Did that on my old Exige and when mirrored it just reflects all the black carpet and disappears.
Couple of notes on the fitting process:
There’s no need to remove all the screws under the lever surround panel.
Just these two yellow-arrowed:

And I think the armrest latch can be left in place. It’s not connected to the console top.

And I found the climate controls a right fiddle to get back in somehow.
Funny to see how Lotus bodged it with plastic spacers.
Also cleaned off the green paint from the bolts and removed the visible sticker and unnecessary lugs from the rear of the pocket (which just lifts out after removing the bolts under the rubber mat).
I’ll be putting some foam in the gaps between the tunnel and the lower console (already lost a screw down there).
It was the unknown about how the mesh panels were attached that put me off doing this earlier.
Pleasantly surprised to find they’re just slotted in.
Well done again @kitkat for doing something a lot of us have been thinking about doing since we got our cars.

Left the gaiter on:
It’s an Alcantara one from Hide and Seam so still looks OK.
Polished up the moustache a bit, but deliberately not to a mirror.
Did that on my old Exige and when mirrored it just reflects all the black carpet and disappears.
Couple of notes on the fitting process:
There’s no need to remove all the screws under the lever surround panel.
Just these two yellow-arrowed:
And I think the armrest latch can be left in place. It’s not connected to the console top.
And I found the climate controls a right fiddle to get back in somehow.
Funny to see how Lotus bodged it with plastic spacers.
Also cleaned off the green paint from the bolts and removed the visible sticker and unnecessary lugs from the rear of the pocket (which just lifts out after removing the bolts under the rubber mat).
I’ll be putting some foam in the gaps between the tunnel and the lower console (already lost a screw down there).
It was the unknown about how the mesh panels were attached that put me off doing this earlier.
Pleasantly surprised to find they’re just slotted in.
Well done again @kitkat for doing something a lot of us have been thinking about doing since we got our cars.
This is what I am going to do as wel. Love it!I’ve also done it slightly differently (until I can get the 3D printing sorted).
Left the gaiter on:
View attachment 54743
It’s an Alcantara one from Hide and Seam so still looks OK.
Polished up the moustache a bit, but deliberately not to a mirror.
Did that on my old Exige and when mirrored it just reflects all the black carpet and disappears.
Couple of notes on the fitting process:
There’s no need to remove all the screws under the lever surround panel.
Just these two yellow-arrowed:
View attachment 54744
And I think the armrest latch can be left in place. It’s not connected to the console top.
View attachment 54745
And I found the climate controls a right fiddle to get back in somehow.
Funny to see how Lotus bodged it with plastic spacers.
Also cleaned off the green paint from the bolts and removed the visible sticker and unnecessary lugs from the rear of the pocket (which just lifts out after removing the bolts under the rubber mat).
I’ll be putting some foam in the gaps between the tunnel and the lower console (already lost a screw down there).
It was the unknown about how the mesh panels were attached that put me off doing this earlier.
Pleasantly surprised to find they’re just slotted in.
Well done again @kitkat for doing something a lot of us have been thinking about doing since we got our cars.
View attachment 54747
Similar threads
- Replies
- 100
- Views
- 21K
- Replies
- 6
- Views
- 2K
- Replies
- 38
- Views
- 5K


