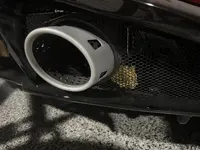
I was washing my Emira this morning and came up with a helpful solution for cleaning bugs out of the corners of the mesh on the front bumper. I had a cheap panel popper tool kit with the perfect little plastic tool for the job. The flat tool with tapered and rounded ends allowed me to get right into the tight edges of the mesh to scrap out all the bugs and debris. The plastic is hard enough for the job but not too hard or sharp to damage the paint or wire mesh.
Here's a link to the panel/trim removal kit: https://a.co/d/2Imtosw
Here's a link to the panel/trim removal kit: https://a.co/d/2Imtosw