Anyone have them they can post? I see they were released on 01/23/2023, however I cannot find a copy (Free).
Navigation
Install the app
How to install the app on iOS
Follow along with the video below to see how to install our site as a web app on your home screen.
Note: This feature may not be available in some browsers.
More options
Style variation
-
📸 We've added a new feature to the site, the Showcase! You can check it out at this link: EmiraForum.com Showcase
🖼️ You can read a bit more at the announcement thread as well: Showcase -- an upgraded Journal
You are using an out of date browser. It may not display this or other websites correctly.
You should upgrade or use an alternative browser.
You should upgrade or use an alternative browser.
Lotus Emira Service Notes
- Thread starter DerTheDer
- Start date
Some thoughts from reading the service notes:
- Clutch replacement still requires engine removal when going by the book.
- All four fenders are pretty easy to remove.
- Removing the center console to potentially remove the shifter mesh involves removing lots of switches and harnesses and potentially both seats according to the service notes.
- Clutch replacement still requires engine removal when going by the book.
- All four fenders are pretty easy to remove.
- Removing the center console to potentially remove the shifter mesh involves removing lots of switches and harnesses and potentially both seats according to the service notes.
It seems the key to access is the VIN.Anyone have them they can post? I see they were released on 01/23/2023, however I cannot find a copy (Free).
Denied Access is soon to be the title of my autobiography.
Living in denial and other suburban myths.
The key is money, just like every other modern auto mfg repair center site.It seems the key to access is the VIN.
Denied Access is soon to be the title of my autobiography.
Living in denial and other suburban myths.
$32 later I have a 600 page repair manual.
What year/market is the manual for?The key is money, just like every other modern auto mfg repair center site.
$32 later I have a 600 page repair manual.
First edition manual and all the indications I’ve seen show LHD, and it’s mostly a global car from what I can tell.What year/market is the manual for?
Can you check if there is something noted regarding subwoofer install/service?The key is money, just like every other modern auto mfg repair center site.
$32 later I have a 600 page repair manual.
Good to know before spending money to get it

Yup.Can you check if there is something noted regarding subwoofer install/service?
Good to know before spending money to get it
- Remove rear bulkhead trim (6xm5x16 bolts 6 clips)
- Remove b pillar trim (pop-off pieces and the seatbelt bolt plus M6x20 bolt, 2 clips hold in place)
- Remove rear quarter left side trim. (3x M6-20 bolts, one M5x16 bolt, and 5 clips)
- 4x M6x20 bolts securing the subwoof in place.
Yup, few pages on connections to the seat, the spool mechanism, and the upper bolt.Does it say how to remove / replace the seatbelts?
It depends what the T&Cs of the download were. If you'd be breaching Lotus copyright by making it publicly available then Lotus would probably issue a take-down notice to the forum if you linked it on here. Check the copyright section of our terms here.Does posting the service notes pose an issue @TomE ?
If engine removal is still required to get to the clutch then hopefully the panel removal is easier than removing the whole rear clam on the Evora. Do the notes quote a "book time" for carrying out the clutch change?Some thoughts from reading the service notes:
- Clutch replacement still requires engine removal when going by the book.
- All four fenders are pretty easy to remove.
- Removing the center console to potentially remove the shifter mesh involves removing lots of switches and harnesses and potentially both seats according to the service notes.
No book time quotes however removal of the engine requires removal of the boot area which also means removal of rear bumper and rear fenders. Likely nowhere nearly as labor intensive as the old rear clam but still quite a few body panels needs to be removed.If engine removal is still required to get to the clutch then hopefully the panel removal is easier than removing the whole rear clam on the Evora. Do the notes quote a "book time" for carrying out the clutch change?
Thank you ♥Yup.
- Remove rear bulkhead trim (6xm5x16 bolts 6 clips)
- Remove b pillar trim (pop-off pieces and the seatbelt bolt plus M6x20 bolt, 2 clips hold in place)
- Remove rear quarter left side trim. (3x M6-20 bolts, one M5x16 bolt, and 5 clips)
- 4x M6x20 bolts securing the subwoof in place.
Haha I just noticed they have an hourly option, even cheaper!The key is money, just like every other modern auto mfg repair center site.
$32 later I have a 600 page repair manual.
Man.v.Cars
Emira Fan
An older thread but a quick question before I pay for the download, or if you care to answer.Yup, few pages on connections to the seat, the spool mechanism, and the upper bolt.

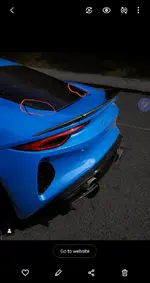
The side panels down either side of the rear glass, black on mine as it has the black pack, does it show how to remove the bottom part left and right, and a part number? Indicated on the picture in red.
Thank you.
Attachments
DMed you but:An older thread but a quick question before I pay for the download, or if you care to answer.
The side panels down either side of the rear glass, black on mine as it has the black pack, does it show how to remove the bottom part left and right, and a part number? Indicated on the picture in red.
Thank you.
Not much instruction here, looks like it's stickied on. As for part numbers:
Parts Shop - Bell and Colvill
Parts Shop - Bell and Colvill are selling and servicing cars from its showrooms.
Man.v.Cars
Emira Fan
Thanks for that, much appreciated.DMed you but:
View attachment 49168
Not much instruction here, looks like it's stickied on. As for part numbers:
Parts Shop - Bell and Colvill
Parts Shop - Bell and Colvill are selling and servicing cars from its showrooms.parts.bellandcolvill.co.uk
View attachment 49169
View attachment 49170

Emira Forum Images


Emira Forum Images
Similar threads
- Replies
- 2
- Views
- 2K
- Replies
- 2
- Views
- 1K
- Replies
- 7
- Views
- 995

