CCfastlefe
New member
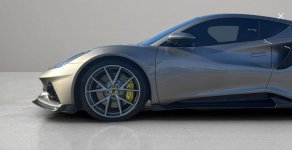
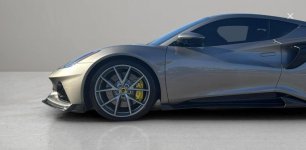
I finally took the plunge, and my Emira now sports the Hethel Sport body kit, or at least most of it! The majority of the kit is genuine Hethel Sport, while the rear lip is GRP. Here's how it went:
Hethel Sport available at GRP!
Rear GRP Lip in carbon
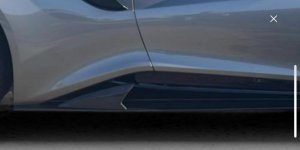
Side air intake scoops in black.
Front lip in carbon
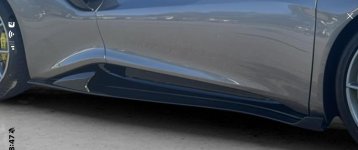
And GTS side skirts in carbon(They look like the sides of a Huracan)
Quality:
The craftsmanship of this carbon fiber aero kit is outstanding. Every piece looks stunning and feels well-made. From the way they catch the light to the way they fit the car, these components clearly reflect high-quality materials.
Installation:
Installing the kit was a relatively straightforward process, with a few details worth noting:
Fitment was flawless. Every piece lined up perfectly with no adjustments needed. Once installed, the kit transformed the car’s look, adding an exotic and aggressive vibe while still preserving good ground clearance for everyday use.
It’s an approachable project. Highly recommended for anyone looking to enhance their car's aesthetics and presence.
If you have questions or want more details about the process, feel free to reach out!
Hethel Sport available at GRP!
Rear GRP Lip in carbon
Side air intake scoops in black.
Front lip in carbon
And GTS side skirts in carbon(They look like the sides of a Huracan)
Quality:
The craftsmanship of this carbon fiber aero kit is outstanding. Every piece looks stunning and feels well-made. From the way they catch the light to the way they fit the car, these components clearly reflect high-quality materials.
Installation:
Installing the kit was a relatively straightforward process, with a few details worth noting:
- Side Skirts: Quick and easy to install—around 30 minutes. Removing eight screws per side, positioning the skirt, and reattaching was all it took. I opted for M5 screws with Loctite for extra security, but the original screws could have worked just as well.
- Front Splitter: A more involved process due to the number of bolts, but still manageable. The kit included riv-nuts, but I chose to use well-nuts for this section. I installed four well-nuts at the front and reused some existing hardware. Removal of the black side aero pieces was necessary but not difficult. Using a Quick Jack made things more convenient, but it’s entirely doable with the car on the ground—just a bit more time-consuming.
- Rear Lip and Side Pieces: These relied on 3M auto trim tape. The key here is patience—proper alignment matters more than speed. Rushing won't earn you extra points, so take your time for the best results.
Fitment was flawless. Every piece lined up perfectly with no adjustments needed. Once installed, the kit transformed the car’s look, adding an exotic and aggressive vibe while still preserving good ground clearance for everyday use.
It’s an approachable project. Highly recommended for anyone looking to enhance their car's aesthetics and presence.
If you have questions or want more details about the process, feel free to reach out!
Attachments
-
 473572889_10161685142222572_123613526002162744_n.jpg48.5 KB · Views: 81
 -
 473624886_10161685142277572_460038528010376342_n.jpg37 KB · Views: 74
 -
 473669647_10161685142367572_5572894811227090097_n.jpg38.6 KB · Views: 74
 -
 473786127_10161685141802572_3966597786580719912_n.jpg38.1 KB · Views: 73
 -
 473692191_10161685141572572_2525758375682098754_n.jpg39.9 KB · Views: 72
 -
 473574636_10161685142347572_6664432922056618066_n.jpg71.3 KB · Views: 69
 -
 473670821_10161685142332572_8189250833873129057_n.jpg103.9 KB · Views: 65
 -
 473675616_10161685142392572_3272774442168602935_n.jpg105.4 KB · Views: 65
 -
 473681147_10161685142242572_2922456781414979390_n.jpg101.4 KB · Views: 73
