Great effort for a great matching result. Your directions may help others wanting to change their letter color but I suspect your Emira may be fairly unique since few others will be up to the challenge of doing all that meticulous work. Congrats!
Navigation
Install the app
How to install the app on iOS
Follow along with the video below to see how to install our site as a web app on your home screen.
Note: This feature may not be available in some browsers.
More options
Style variation
-
📸 We've added a new feature to the site, the Showcase! You can check it out at this link: EmiraForum.com Showcase
🖼️ You can read a bit more at the announcement thread as well: Showcase -- an upgraded Journal
You are using an out of date browser. It may not display this or other websites correctly.
You should upgrade or use an alternative browser.
You should upgrade or use an alternative browser.
What did you do to your Emira today?
- Thread starter MYFASTEFE
- Start date
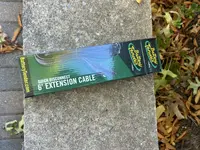
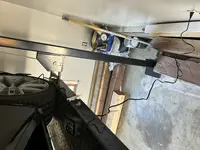
Test fit battery charger for the winter, 6 foot extension cable, lets you keep the charger off the car. Seems to work well when on the top of the lift.
Attachments

Liquid Hot Magma
Well-known member
Thank you. It does require an extra effort to get it done right. I hope the information I’ve provided proves useful for those who do attempt their own badge mod.Great effort for a great matching result. Your directions may help others wanting to change their letter color but I suspect your Emira may be fairly unique since few others will be up to the challenge of doing all that meticulous work. Congrats!
how many fingers of space do you have?First time taking it out after GRP lowering sleeves and 12mm spacers installed. Before the height difference made the Emira slightly less supercar looking next to the others at exotic meets. Now that’s gone, the height and gap is the same or even less.
View attachment 53869View attachment 53870
Washed off all the grime from the weekend road trip (ref: Japan - 2024/10/25 (fri) Hokuriku Tour (北陸ツーリング) thread).
I THINK it's clean now... we'll know for sure in the morning.

I THINK it's clean now... we'll know for sure in the morning.
Tow hook... bought the same from GRP, fully screwed in it stays at about 45 degrees to the ground level

Ouch.Tow hook... bought the same from GRP, fully screwed in it stays at about 45 degrees to the ground level

Down or up?
i mean, left to right. It doesn't stop at a nice leveled position.
Ouch.
Down or up?
You might try putting some thread sealing tape on it to help get a better alignment. I tightened mine by hand and then used a wood dowel to barely finish the last bit to level. I didn't want to go too far and then have to loosen it to get level. It has been rock solid since. The threads have a little Delrin pin through them that helps add resistance so that you can get it level without bottoming out the threads.Tow hook... bought the same from GRP, fully screwed in it stays at about 45 degrees to the ground level
Washer of various thicknesses will help align it if you’re ocd about it won’t it?Tow hook... bought the same from GRP, fully screwed in it stays at about 45 degrees to the ground level
Bags packed ready for the start of our re 3000km road trip over the next two weeks.
Leaving Adelaide tomorrow morning for Melbourne (Geelong) to catch the ferry to Tasmania where some of the best roads and scenery in Australia await.
Will be a great test of the car.
Genuinely surprised at how much we can get in these wonderful Bagworld bags.
Leaving Adelaide tomorrow morning for Melbourne (Geelong) to catch the ferry to Tasmania where some of the best roads and scenery in Australia await.
Will be a great test of the car.
Genuinely surprised at how much we can get in these wonderful Bagworld bags.
Attachments
Looks great. Where did you purchase the seat belts?
There are many shades but the right one I found here on aliexpress.
Looks great. Where did you purchase the seat belt
There are many shades but the right one I found here on aliexpress.
You rewebbed it yourself??
I went to a local auto repair shop and they wouldn’t replace seatbelts unless using all OEM parts, making it impossible to change seatbelt color.I wouldn’t feel comfortable DIYing this with Chinese parts. Seatbelts are an important safety item. That’s just me though. They look awesome and aliexpress is crazy cheap. Normally it’s like $100 or so right?
The AliExpress belts look to be all 3.8 metres long by 4.8 cm wide (per seat) and some specify 1 cm thick with child seat webbing being thicker, whereas other listings don’t mention thickness, like the listing for the webbing GlobalPilot777 purchased. Like kitkat I’m curious to know if GlobalPilot777 replaced the webbing himself or found a shop willing to do it.
Some AliExpress listings mention the need to sew the supplied buckle fasten buttons and recommend a professional do that, plus some mention sending them the old seatbelt assembly and they’ll substitute the webbing with normally a 2-day turn-around time (no costing mentioned), so perhaps GlobalPilot777 sent his to them?
Hopefully GobslPilot777 will provide more details.
I’m interested in installing a striped webbing AliExpress has listed, but those listings don’t describe the webbing strength, so I suppose it’s somewhat “iffy” safety-wise and I’d have to trust AliExpress, which “seriously” isn’t keen to do. Decisions decisions…
Liquid Hot Magma
Well-known member
@netsinah check these posts out. I had good experience with this company:I went to a local auto repair shop and they wouldn’t replace seatbelts unless using all OEM parts, making it impossible to change seatbelt color.
The AliExpress belts look to be all 3.8 metres long by 4.8 cm wide (per seat) and some specify 1 cm thick with child seat webbing being thicker, whereas other listings don’t mention thickness, like the listing for the webbing GlobalPilot777 purchased. Like kitkat I’m curious to know if GlobalPilot777 replaced the webbing himself or found a shop willing to do it.
Some AliExpress listings mention the need to sew the supplied buckle fasten buttons and recommend a professional do that, plus some mention sending them the old seatbelt assembly and they’ll substitute the webbing with normally a 2-day turn-around time (no costing mentioned), so perhaps GlobalPilot777 sent his to them?
Hopefully GobslPilot777 will provide more details.
I’m interested in installing a striped webbing AliExpress has listed, but those listings don’t describe the webbing strength, so I suppose it’s somewhat “iffy” safety-wise and I’d have to trust AliExpress, which “seriously” isn’t keen to do. Decisions decisions…
Post in thread 'Everyone's Mod Priority List'
https://www.emiraforum.com/threads/everyones-mod-priority-list.4127/post-120680
Post in thread 'Everyone's Mod Priority List'
https://www.emiraforum.com/threads/everyones-mod-priority-list.4127/post-120677
Emira Forum Images


Emira Forum Images
Similar threads
- Replies
- 43
- Views
- 3K
- Replies
- 205
- Views
- 14K
- Replies
- 4
- Views
- 598
- Sticky
- Replies
- 82
- Views
- 10K

